Monday, October 25, 2010

Wall Hanging/Lasting Memories Challenge

Lasting Memories' chalenge # 12 was to use flip flaps on your project. Easy enough since I love the CTMH flip flaps - they are great for adding extra photos or hidden journaling to a project.
I made a wall hanging for my daughter by flipping the CTMH My Creations Memory Showcase album. The album is typically a stand alone accordion but I had the HH drill holes in the top so that I could hang it length wise, using coordinating ribbon. She loves it! ( It is 36" in length and was pretty hard to photograph!)


Still can't figure out why some of my photos flip themselves : (

Details:


Here's the flip flaps, with extra photos!

Some of the items used for this project:
My Creations Memory Showcase Album 9 x 9 (Z1198, $5.95)
Sparkles (Z1327 and Z1326 $2.95 per package)
Flip Flaps (Z4114, $3.95 per package of 15)
Hemp (Z280, $2.25 per 8 yards)
Cherry-O Level 2 Paper ( X7132B $12.95 for 12 double sided papers and 10 card stock)
Cherry-O Level 1 Kit (X 7123A, $9.95 for 4 preprinted pages, 2 card stock, 2 double sided papers and 2 sheets of stickers)
Tulip Mini Medleys (Z1320, $4.95 for 8 buttons, 6 photo clips w/brads, 10 bigger brads, 20 regular brads and 1 yard ribbon)

Thanks for stopping by!
Marie with a : )

Friday, October 22, 2010

CAS and More Mistletoe

I don't know why I've been on a Christmas card kick lately except I love the Mistletoe paper!  The second card is one I plan on having as a make-and-take at my Open House on Tuesday (It doesn't look like there will be many folks showing up. C'est la Vie!
This first one is for the Clean and Simple FTL 113 challenge


I love these little guys from the CTHM set Merry Persuits (B1313)
As you can see, I didn't quite follow the sketch as I put my sentiment on one of the squares and I flipped the card.


You can't really tell from the photo, but the Christmas lights have liquid glass on them, making them look like real bulbs.  This cute set of lights is just one of the images on CTMH's stamp of the month for October. Find out how you can get it for 25% off, 50% off, 75% off or FREE: CLICK HERE to view stamp set and details. And remember, the profits from any orders in October -  November will be sent as support funds to Alyssa - who will be  leaving Germany and heading to India, Ethiopia or Jordan after her Discipleship training.


Thanks for stopping by,
Marie with a : )

Wednesday, October 20, 2010

Mistletoe, Snow Friends and Sweet Sketch 72

(note: if you are a new follower, welcome and thanks!  Let me know (leave a comment or e-mail) so I can go and check out YOUR blog)
I created this card using Sweet Sketch Wednesday's sketch #72:

Below photo shows the tag inside the brown bag:

Don't you just LOVE the mistletoe paper?  I do!  It's so versatile.  Here are the CTMH supplies I used:
Stamp Sets: Snow Friends (D1244), Happy Journey (D1428)
Inks: New England Ivy (Z2135), Tulip (Z2166), Cocoa (Z2114) and White Daisy (Z2163)
Paper Pack: Mistletoe (X7130B)
Ribbons: Twill (Z1099 with a price drop from $7.95 to $4.95 for 20 yards!!) and cranberry (Z2109)
Tools, Etc. : Waterbrush (1771), Edge Distressor (Z1297) Stardust glitter gel (Z1313) Blending Pen (3174)

Thanks for stopping by,
Marie with a : )

Sunday, October 17, 2010

CTMH Weekly Planner

Even though I'm not yet done with my 2010 calendar (lol, I'm looking for just the right photos for December!), I've started on a 2011 weekly planner.  These planners are 9" x 9" and are an excellent value at only $12.95.  Visit my WEBSITE and order item # X301.  To view the cover, visit THIS POST


This layout meets the requirements for the following challenges:
OCC: Embellishments
and Scrap and Stamp: stitches


Thanks for stopping by,
marie with a : )

Saturday, October 16, 2010

Twisted Sketches...and a really big mess!

(Note: if anyone wants to order planners, the price has dropped from $16.95 to $12.95!! Simply visit MY WEBSITE and order item # X301 )
I didn't spend much time in the craft room today, but did make a really quick Twisted Sketches 71 layout for the CTMH planner that I'm making for 2011.  (I thought if I start now I might be finished by the end of 2011...I'm almost done with my 2010 calendar, lol...just have a December layout to make.  But hey, that's still six weeks away...)
Anyway here's the cover for my planner:

(I originally had the word "US" but then changed it to 2011 since it is my 2011 planner)


Here's what each week of the planner looks like.  I'll get to make 52 layouts to go in it!

My sister, Samantha was busy being far more productive than me, on the other side of the world. Okay, slight exaggeration but the east coast seems like a long way off. Anyway, she's one of the most organized people I know...she showed a photo of her "mess" earlier and I was thinking to myself "that girl doesn't know what a mess looks like!" So I thought I'd show her:

All I made was ONE 9 x9 layout and look:


I wish my sister lived close by...not just so we could craft together...but because some of her oranizational talents might rub off on me...

Thanks for stopping by!
Marie with a  : )

Monday, October 11, 2010

Keep It Simple

A challenge for scrapbookers seems to be the time it takes to decide on a layout, photos, colors etc.Some find it so daunting that they simple don't get started!  My general rule of thumb is keep it simple.  If you have the time to be leisurely, then by all means create something detailed and intricate...otherwise keep it simple.  The main purpose for scrapbooking is to preserve memories, (and in my case to record  our faith, and the work that God has done in the lives of my family members) to pass down for generations to come.  It doesn't have to be complicated OR time consuming. (Ask Naomi - a brand new scrapbooker - who created almost an entire scrapbook this week!)

Here are the basic steps I take for creating a layout:
1. I choose the photos I want to use. I don't use all of the photos I take, and I don't even scrapbook every event that I take pictures of.  My preference is to use one 5 x 7 or 8 x 10 as a focal point and then add add a few others that complete the story or moment I want to preserve.  There are times, however, when a total collage of photos are necessary.

2. I choose a solid color cardstock for the background. This is almost always a neutral color such as white or cream.  I believe these background colors do a better job of bringing out the photos...not to mention the fact that these cardstocks can generally be purchased in bulk for a cheaper price than colored or patterned cardstock.

3. I choose a style for my layout. I determine ahead of time if I'm going classic, vintage, "cutesy" or whatever. This makes choosing papers and embellishments easier.

4. I decide on two or three coordinating papers and some matching embellishments. ( visit my CTMH website to order some of the finest quality coordinating papers, cardstock and embellishment on the market today...and have it delivered right to your home!)


5. I create a simple layout, using the papers and embellishments to draw attention to the photos. I believe too much "artwork" takes away from the photos. Move the photos around to see your favorite placement.  Keep a link to a favorite blog or website handy for when you are stuck and need a little inspiration. There are plenty of scrapbook "challenges" out in blogosphere that give you layout ideas.  One of my favorites is TWISTED SKETCHES which has layouts for scrapbook pages AND cards.  (For archived sketches see the links on the left side.)

Here's a simple layout I created last night while getting beat at  playing Scrabble with Josh:

Notice there's not a lot of "stuff" on this page.  I guess you could call me a scrapbook minimalist : ) Just a photo, a few flowers, a piece of ric rac and the journaling. 

Again, not a lot of "stuff" but a few more photos keeping with the theme that I journaled. 

about the layout: It's a little thing, one that might go unnoticed by many, but I think my kiddos will always remember that their dad was never afraid to have his arm around me or hold my hand when we were out in public. (We're not talking ooey PDA, just the simplicity of hand holding or an arm around me.  It makes me feel cherished and I appreciate that about the HH)

Contact me if you'd like to join one of my monthly scrapbook workshops/clubs.  I explained about the workshops in THIS POST.  The first group is full but I am hoping to get a couple more groups going.

Thanks for stopping by,
Marie with a : )

Saturday, October 9, 2010

Scrapbooking Problems and Solutions...and some awesome layouts by beginners...

On my new facebook business page,  I asked the question: What do you find most daunting about scrapbooking ?  The responses I received would indicate that finding the time and finding a place to scrapbook are the two most difficult aspects.  I suspect this is especially true for those with young children!

The first thing I would remind my scrapbooking friends is that scrapping is meant to be fun!  Don't stress yourself about feeling "behind."  Every single layout you create is a gift for your family to treasure in the years to come.  If you only create 24 layouts a year, that is 48 pages per year for your loved ones to look back on.  It is not necessary to scrapbook everything - instead you could tuck pieces of paper in between the layouts (so they aren't seen) with written descriptions of things that occurred during a certain time frame and only scrapbook some of the photos.  I also think it is just as important to scrap the everyday moments as it is to preserve the more momentous ones.  The key is balance and not overwhelming yourself with thinking you need to put every photo and every event into a scrapbook.

Next I would say schedule a day for yourself each month to simply scrap.  If you have young children it can seem impossible because as soon as you  get your supplies out,  it is time to feed them or put them down for a nap or change a diaper or referee. Plan easy meals ahead of time, or hire an assistant for that one day...maybe you even have a helpful hubby, a friend, niece or nephew who would be willing to take over child care duties just 'cause they love ya! OR swap days with another scrapping friend.  Also, decided ahead of time what photos you want to work with. If you set aside an entire day each month and complete just 2 layouts (4 pages) you will have 48 pages at the end of the year!

I know that I am fortunate to have a craft room so finding a space isn't an issue for me.  For the majority of folks, however, that isn't the case.  I would suggest setting up a card table or using your dining room table (plan meals that can be eaten "picnic style" somewhere other than at the table.  Keep the layouts reasonably simple and you won't need a lot of space.  I'm all about clean and simple pages with the emphasis on the photos, titles and journaling. I tend to cringe when I look back over my first couple of scrapbooks, because I seemed to feel the need to put everything and anything on my pages. They are pretty grotesque compared to the simpler layouts I now create.  My children love to look through the scrapbooks and they aren't so concerned with the layouts as the memories they evoke. In fact,  I was surprised by a comment my sixteen year old son made the other day that made me realize even he pays a lot more attention to the scrapbooks than I ever would have guessed!  I cannot emphasize enough the journaling.  That is one of the main purposes for scrapbooking!  If you'd like to keep the journaling hidden, see Close To My Heart's Flip Flaps.

Of course simple solutions to the time and space dilemma would be to contact me about one of my monthly scrapbook workshops.  The cost is $35.95 each month ($29.95 plus S & H and tax) and includes an exclusive set of stamps, coordinating papers, card stock, embellishments and a How-To guide for creating one layout and several cards plus a second layout idea.  The retail value is $32.95 before S & H and tax - a savings of $3. At my first workshop/club, each of the girls completed 4 pages plus AT LEAST one card.  There will be lots of scraps left over for additional cards. I also supply many additional stamps - including large letters for titles, such as the one Naomi created, punches, circle cutters and dozens of die cuts for your use while here. All you need to provide is your own paper cutter, adhesive, scissors...and photos.  The December kit has some gorgeous Christmas papers and card stock. (I like it so much I got TWO sets of it...)

Some folks struggle with the whole choosing paper, layouts etc. aspect.  I'll write about that next time.  For now, here's one of brand new scrapbooker Naomi's layouts:


Grrrr...I can't figure out how to flip some of the photos so they show up the right way. They are right side up in my picture album but mysteriously flip when I post them.  Anyone know what's going on?

Naomi created her very first page six days ago.  In the past five days she created eleven more pages for a total of 12 pages in one week!  This is a busy girl who is a senior in high school, a part time student at a nearby university, a cheerleader and and one of the editors of the school newspaper.  Now she can add prolific scrapbooker to that list!

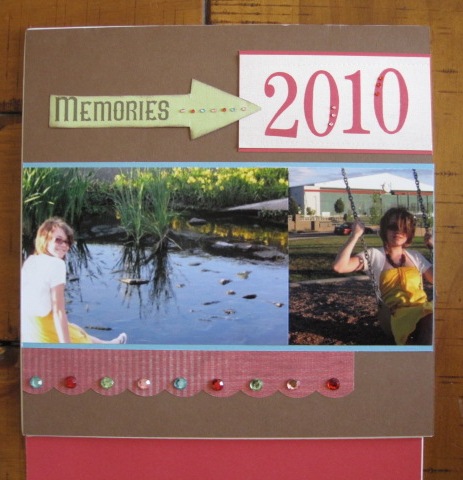
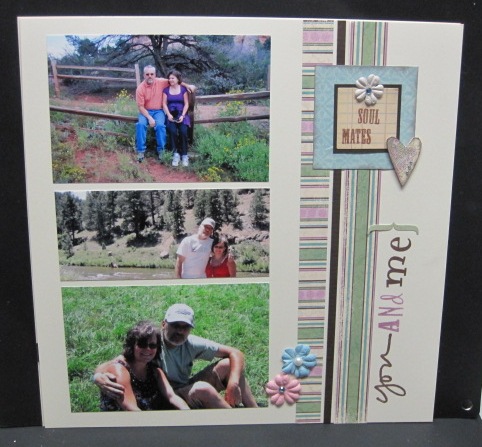
And here are a few layouts that my fourteen year old daughter created (she created seven pages herself this week!):


In this photo she is at a Rockies game with her dad...hence the huge smile. The title page of this layout says "I Heart (huge chipboard heart) my dad and the Rockies.  I'm glad she put her dad first!

Another flippin' photo :/  


And a reminder...all profits from my Close To My Heart business during the month of October and the month of November will go to support Alyssa's YWAM outreach mssions trip.  She's currently attending the lecture phase in Germany, but will find out at the end of next week whether she heads to Africa or Asia after that.

Thanks for stopping by,
Marie with a : )

Wednesday, October 6, 2010

Lotsa Layouts and a Not-So-Scary side stair step card

For the first meeting of the Ebenezers Scrapbook Club we created 2 layouts (4 pages) using the Passages Workshop on the Go Kit.  We also created a side stair step card (a tutorial link can be found under my "tutorials and such" page at the top of my blog.)
I didn't follow the instructions for the Work shop on the Go layouts (there's just something in me that rises up against following instructions, lol)  but the other girls at the workshop did and their pages turned out so fabulous that I kinda regretted not following along. I'm hoping that one of them will take pictures and post them on my Isom Cre8tions facebook page so you can see.  One of the gals also had materials cut and ready to go for making several cards with the leftover pieces (and this was her first time scrapbooking!!)
So first, here's the side step card, using the Hooligans paper and Party Animal stamp set:

the inside reads: Happy Autumn
And now for my Passages layouts:


Another one of those won't flip photos : (

And because it was a can't lie down and sleep kind of week (due to pain from an Interstitial Cystitis flair up) I completed lots of layouts.  Here's two more:


Alyssa and I visited my sister and her partner who live in DC.  We took a "Segway in the City" tour - what a blast!
Page 1

page 2

These flowers are merely punched out from card stock and then glimmer misted with my homemade glimmer mist.

And here's a just for fun photo of something Alyssa sent us from Germany:
(REAL Gummi Bears...yum : )  )